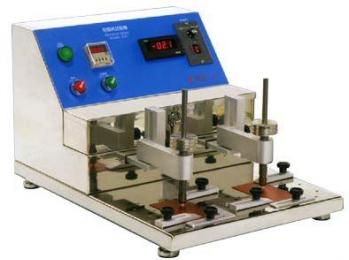
D10 塗裝耐刷洗線性測試儀
D10
塗裝耐刷洗線性測試儀
Washability / Linear Test Equipment
廠牌:代理
供應商:大台北尖端儀器有限公司
聯絡電話:02-2531-0981
| 快速詢價 |
行動條碼QR Code

|
22個多型號試驗儀: 可進行磨耗, 耐擦性 ,耐洗性,靜態,動態摩擦試驗。
這種類型的設備的測試,是通過兩個表面在一定條件下相互摩擦,並確定由此產生的樣品的任何改變或表面之間的相互作用。
磨耗測試儀系列涵蓋了從最簡單的耐擦洗測試儀到最精密的能提供記錄測試運動阻力的設備。這類測力的方式能夠消除潛在的主觀人為因素帶來的影響。
·尺寸/重量:所有型號的基座就是一個0.25英吋厚的鋁板。所有型號都是16英吋寬,長度除了D5, D7, D8, D9 & D10 型是16英吋外其餘型號均為22英吋。淨重約40-50磅。
·為了防止受到意外液體洩漏的危險,所有功能元件都被安裝在測試平面的上方。
·所有功能組件都是厚實的經打磨的鋁材。
·驅動桿由1/16英吋不銹鋼焊接而成。
·線性摩擦由單一的驅動系統提供動力。
·驅動桿相對驅動架垂直可調。在最低位,它至少高於測試表面和玻璃板半英吋。這種相對低的位置減少了水平方向上的傾斜。
·驅動桿的每個齒上都有三個間距相同的孔。
摩擦力測試中有兩個基本因素:一個是樣品表面的光滑度狀況,但另一個因素也許更重要:樣品經過清洗或磨損試驗後,其表面狀況會發生明顯的變化。摩擦力的定義是:每當一個物體相對於另一個物體移動時,阻礙相當移動的力就稱之為摩擦力。
物體表面之間的摩擦特性:
樣品表面的特性
樣品表面所受到的壓力
兩種介質在一定範圍內的接觸面積
兩種介質在一定範圍內的運動速率
靜摩擦總是大於動摩擦
摩擦係數的定義是兩表面間的摩擦力和作用在其一表面上的垂直力之比值。摩擦係數範圍很廣。比如:抹油相對於金屬表面可以低至0.05,濕皮革相對於金屬大約是0.36,乾皮革相對於金屬大約是0.56。
為了測試任意兩種物體表面的摩擦,一個物體對於另一個物體必須有相對移動。作用於物體表面的壓力必須是固定的而且可知的。
這款線性磨耗儀完全適用於摩擦力的測試。為了滿足不同的測試要求,各種型號的儀器不僅可以用於樣品之間的測試,而且能夠直接用於樣品與儀器表面的摩擦測試。在可調速率的情況下,磨耗儀能夠在足夠低的速度運行,使動能和動量的因素可能被忽略。當作用於大多數物體表面時,建議採用每秒3-5英吋的速度。即使在機器面板上有力的顯示,記錄器仍被推薦用於測試中。在機器的測試過程中,記錄器表現出良好的精確度以及對摩擦阻力的及時反饋。
為了測試各種各樣的物體表面,我們提出在摩擦移動裝置和海綿盒子上附加的一定的重量。這兩者都是直接通過標準桿或機器驅動桿進行驅動。
線性摩擦磨耗測試儀參數
Note: V =調速 F = 力感應 I = 內置數據傳輸
|
|||||||||||||||||||||||||||||||||||||||||||||||||||||||||||||||||||||||||||||||||||||||||||||||||||||||||||||||||||||||||||||||||||||||||||||||||||||||||||||||||||||||||||||||||||||||||||||||||||||||||||||||||||||||||||||||||
|
Washability / Linear Test Equipment
|
|
Models D10 & D16
|
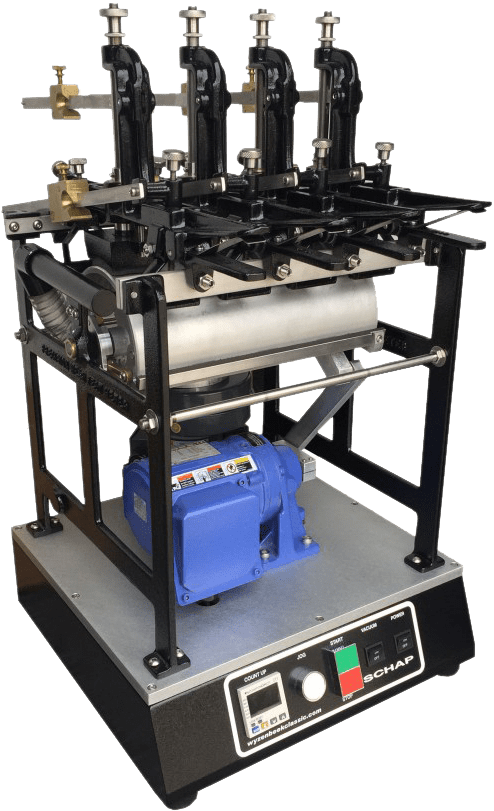
Model D10 is an improvement over existing washability machines. It is a single cycle rate (cyc/min) machine with all of the other advantages listed (see "Characteristics Common To All Models") for the entire line of Linear Motion Test Equipment.
Model D16 is basically the same as Model D10 except it provides a six inch longer stroke length and accommodates a longer test panel.
|
|
Model D16 Only
|
|
|
Technical Data
|
||
|
Model D10
|
Model D16
|
|
|
Stroke Length:
|
10"
|
16"
|
|
Acceleration Distance Minimum:
|
1.1"
|
1.2"
|
|
Acceleration Distance Maximum:
|
1.5"
|
1.2"
|
|
Cycles Per Minute:
|
37
|
37
|
|
Velocity, in./sec.:
|
14
|
22
|
|
Drive Fork Force Maximum lbs.:
|
24
|
17
|
|
Available Items
|
|
Catalog No.
|
Model No.
|
Stroke Length
|
Base Cutout
|
Tray Size
|
Cycle Rate
|
Variable Speed
|
Force Sensing
|
Recorder Option
|
|
WA-2151
|
D10 (D1)*
|
10"
|
No
|
8" X 18"
|
37
|
No
|
No
|
No
|
|
WA-2171
|
D16 (DL1)*
|
16"
|
No
|
8" X 24"
|
37
|
No
|
No
|
No
|
|
* Replaced Model
|
||||||||
|
Variable Speed Models (V)
|
|
Models D10 & D16
|
|
The variable speed models have all of the features as the set speed models, plus variable speed. Each model has its own stroke length for its particular application. The stroke length is centered and shortened from both sides. Rate limits shown for all variable cycle rate (cyc/min) machines are factory set, but may be shifted for specific requirements. Instructions for this change are furnished with the unit.
Model D12V, when fitted with the test sample tray serves as a laboratory machine. This model has the base cutout feature. When the tray is removed, an extended drive fork may be added to pass through an opening in the base plate. This permits a test to be conducted directly on the surface on which the machine is placed. Stainless steel handles are attached to the ends of the housing to enhance portability for field use.
|
 |
|
|
Model D12V Only
|
|
|
Technical Data
|
||||||
|
D7V
|
D8V
|
D9V
|
D10V
|
D12V
|
D16V
|
|
|
Stroke Length:
|
7"
|
8"
|
9"
|
10"
|
12"
|
16"
|
|
Acceleration Distance:
|
1.1"
|
1.1"
|
1.2"
|
1.3"
|
1.2"
|
1.5"
|
|
Cycles per Minute Mini.:
|
7
|
6.5
|
6
|
6
|
5
|
4.5
|
|
Cycles per Minute Max.:
|
70
|
65
|
60
|
60
|
50
|
45
|
|
Velocity, in./sec. Mini.:
|
2
|
2
|
2
|
2.3
|
2.2
|
2.7
|
|
Velocity, in./sec. Max.:
|
20
|
20
|
20
|
23
|
22
|
27
|
|
Drive Fork Force Max. lbs.:
|
52
|
49
|
49
|
45
|
45
|
37
|
|
Available Items
|
|
Catalog No.
|
Model No.
|
Stroke Length
|
Base Cutout
|
Tray Size
|
Cycle Rate
|
Variable Speed
|
Force Sensing
|
Recorder Option
|
|
WA-2123
|
D7V
|
7"
|
No
|
8" X 18"
|
7-70
|
Yes
|
No
|
No
|
|
WA-2133
|
D8V
|
8"
|
No
|
8" X 18"
|
6.5-65
|
Yes
|
No
|
No
|
|
WA-2143
|
D9V
|
9"
|
No
|
8" X 18"
|
6-60
|
Yes
|
No
|
No
|
|
WA-2153
|
D10V (DV1)*
|
10"
|
No
|
8" X 18"
|
6-60
|
Yes
|
No
|
No
|
|
WA-2653
|
D10VP
|
10"
|
No
|
8" X 18"
|
15-45
|
Yes
|
No
|
No
|
|
WA-2164
|
D12V
|
12"
|
Yes
|
8" X 24"
|
5-50
|
Yes
|
No
|
No
|
|
WA-2173
|
D16V (DLV1)*
|
16"
|
No
|
8" X 24"
|
4.5 - 45
|
Yes
|
No
|
No
|
|
* Replaced Model
|
||||||||
|
Variable Speed / Force Sensing (VF)
|
|
Models D7VF, D8VF, D9VF, D10VF, D12VF & D16VF
|
|
The variable speed / force sensing models are basically the same machines as the variable speed machines except a force transducer is added to the drive fork linkage. Output from the force transducer is displayed in large numbers on the front of the machine. The display registers resistance to motion of the fork to the one-tenth pound .
Model D12VF, when fitted with the test sample tray serves as a laboratory machine. This model has the base cutout feature. When the tray is removed, an extended drive fork may be added to pass through an opening in the base plate. This permits a test to be conducted directly on the surface on which the machine is placed. Stainless steel handles are attached to the ends of the housing to enhance portability for field use.
|
|
|
Model D12VF Only
|
|
|
Model D16VF Only
|
|
|
Technical Data
|
||||||
|
D7VF
|
D8VF
|
D9VF
|
D10VF
|
D12VF
|
D16VF
|
|
|
Stroke Length:
|
7"
|
8"
|
9"
|
10"
|
12"
|
16"
|
|
Acceleration Distance:
|
1.1"
|
1.1"
|
1.2"
|
1.2"
|
1.2"
|
1.5"
|
|
Cycles per Minute Min.:
|
7
|
6.5
|
6
|
6
|
5
|
4.5"
|
|
Cycles per Minute Max.:
|
70
|
65
|
60
|
60
|
50
|
45
|
|
Velocity, in./sec. Mini.:
|
2
|
2
|
2
|
2.3
|
2.2
|
2.7
|
|
Velocity, in./sec. Max.:
|
20
|
20
|
20
|
23
|
22
|
27
|
|
Drive Fork Force Max. lbs.:
|
52
|
49
|
49
|
45
|
45
|
37
|
|
Available Items
|
|
Catalog No.
|
Model No.
|
Stroke Length
|
Base Cutout
|
Tray Size
|
Cycle Rate
|
Variable Speed
|
Force Sensing
|
Recorder Option
|
|
WA-2125
|
D7VF
|
7"
|
No
|
8" X 18"
|
7-70
|
Yes
|
Yes
|
No
|
|
WA-2135
|
D8VF
|
8"
|
No
|
8" X 18"
|
6.5-65
|
Yes
|
Yes
|
No
|
|
WA-2145
|
D9VF
|
9"
|
No
|
8" X 18"
|
6-60
|
Yes
|
Yes
|
No
|
|
WA-2155
|
D10VF (DVF)*
|
10"
|
No
|
8" X 18"
|
6-60
|
Yes
|
Yes
|
No
|
|
WA-2166
|
D12VF
|
12"
|
Yes
|
8" X 24"
|
5-50
|
Yes
|
Yes
|
No
|
|
WA-2175
|
D16VF (DLVF1)*
|
16"
|
No
|
8" X 24"
|
4.5 - 45
|
Yes
|
Yes
|
No
|
|
* Replaced Model
|
||||||||
|
Pneumatic - Variable Speed Model (VP)
|
|
Model D10VP
|
|
Model D10VP Pneumatic, Variable Speed Wear Tester. Note capability of testing three specimens simultaneously with 3 brushes in tandem.
The Model D10VP Pneumatic, variable speed washability machine (WA- 2653) is furnished complete with 1/4 NPT quick-disconnect air source fitting, muffler and filter for exterior connection to the machine.
|
 |
|
|
Top Plan View showing location of pneumatic drive components.
|
 |
|
|
|
|
Technical Data
|
|
|
Model D10VP
|
|
|
Stroke Length:
|
10"
|
|
Acceleration Distance:
|
1.1"
|
|
Cycles per Minute Min.:
|
15
|
|
Cycles per Minute Max.:
|
45
|
|
Velocity, in./sec. Mini.:
|
5.6
|
|
Velocity, in./sec. Max.:
|
16.8
|
|
Drive Fork Force Max. lbs.:
|
45 lbs.
|
|
Linear Stroke:
|
7.8 lbs.
|
|
Available Items
|
|
Catalog No.
|
Model No.
|
Stroke Length
|
Base Cutout
|
Tray Size
|
Cycle Rate
|
Variable Speed
|
Force Sensing
|
Recorder Option
|
|
WA-2653
|
D10VP
|
10"
|
NO
|
8" X 18"
|
15-45
|
YES
|
NO
|
NO
|
|
* Replaced Model
|
||||||||
|
Compliance
|
|
All Gardco designed and manufactured linear motion test equipment is described and specified in much greater detail than is called for in most of the many methods of test developed and promulgated by ASTM and other industrial and Federal agencies. Care has been taken in design and manufacture not only to overcome deficiencies in earlier equipment of this type but also to comply with the specifics as well as the intent of existing standards that call for the use of such equipment. The following is a list of standards and methods of test that call for this type of equipment.
|
|
References
|
|
ASTM D 1792 " Long Term Removability Properties of Emulsion Floor Polishes" • ASTM D 2198 "Stain Removal from Multicolor Lacquers" • ASTM D4213 "Wet Abrasion Resistance of Interior Paints" • ASTM D 2486 "Scrub Resistance of Interior Latex Flat Wall Paints" • ASTM D 3206 "Standard Test Method for Soil Resistance of Floor Polishes" • ASTM D-3450 Washability Properties of Interior Architectural Coatings & ASTM D 4828 • ASTM D 4488 Standard Guide for Testing Cleaning Performance of Products Intended for use on Resilient Flooring and Washable Walls • Military Specifications MIL-C-3004, MILC- 46057, MIL-E-11237, MIL-P-1334, MIL-P-15422 • Rock Island Arsenal Specification RIX-268 • Navy Specification 51C20 • Commonwealth of Penna. Specification No. W-4 • Canadian Government Specification 26-G-3 • FTMS 141a, Method 6141, "Washability of Paints" • FTMS 141a, Method 6142, "Scrub Resistance" • FTMS Method 536/6701 • Federal Specifications: P-C-431, P-D-220, P-R-201, P-W-155, T-1279, TT-P-26, TT-P-29, TT-P-30, TT-P-47, TT-P-51, TT-P-508, TT-P-1932, TT-E-505, TT-E-506, TT-E-509, TT-C-535, TT-C-555.
|
|
Simple Operation
|
|
|
Characteristics Common to Pneumatic Model
|
|

