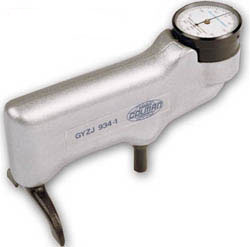
GYZJ934-1/ GYZJ 935 / 936 巴可式硬度計 GYZJ 934-1 / GYZJ 935 /936
GYZJ934-1/ GYZJ 935 / 936
巴可式硬度計 GYZJ 934-1 / GYZJ 935 /936
Barcol Hardness Tester GYZJ 934-1 / GYZJ 935 / GYZJ936
廠牌:代理
供應商:大台北尖端儀器有限公司
聯絡電話:02-2531-0981
| 快速詢價 |
行動條碼QR Code

| 手持攜帶式硬度計, 型號 GYZJ934-1, GYZJ935, GYZJ936 |
| 符合 ASTM D2583; MIL-P-17549-C (SHIPS) |
 |
應用 |
| • 玻璃纖維 • 鋁 • 鋁合金 • 軟質金屬,銅 ,黃銅 • 塑膠 |
|
| 可攜式 | |
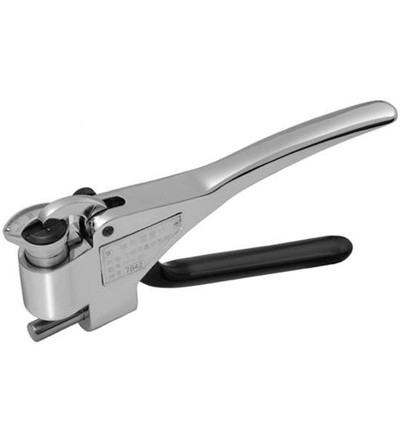
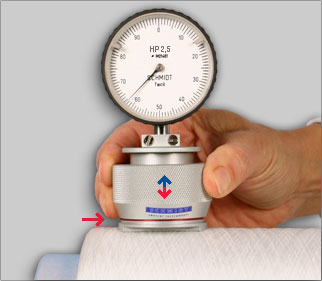
便攜式硬度計是測量鋁合金、銅、黃銅和其它包括塑膠和玻璃纖維等材料硬度的方便工具,儀器設計應用於組裝部件、零件以及原材料的測量。 |
| 易於使用 |
| 易於使用不需要經驗、操作人員可手持巴氏硬度計,在任意位置和空間使用。硬度的數透通過指針在刻度盤上立即指示出來,刻度盤分成100等份,硬度範圍1-100。不需要等待,可隨時隨地使用。 |
| 重量輕 |
| 硬度計重量僅為0.51kg(11b.2oz),加上便攜式手提箱、調整扳手、2個備用壓針重量為1.134kg(21b.8oz)。 |
| 技術資料 | |
| 三種型號可選 | |
| GYZJ 934-1 | 適用於軟金屬,例如:鋁及鋁合金、黃銅、銅和一些硬的塑料和玻璃鋼。大約的範圍25-150Brinell(布氏硬度)150Brinell相當於10mm球承載500Kg壓力。這個標準符合美國測試材料協會(American Society for Testing and Material)ASTM標準D-2583。 |
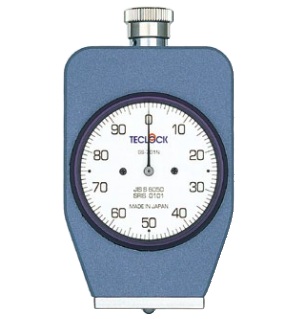
| GYZJ 935 | 適用於較軟的塑膠和很軟的金屬。 約略範圍於 50 到 110 Rockwell "R" |
| GYZJ 936 | 適用於非常軟的材料,例子如:鉛、油布和皮革。 |
| 操作 |
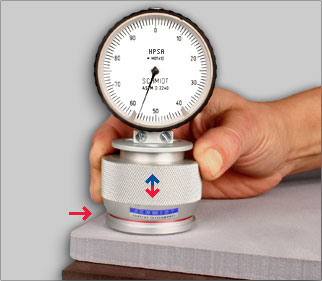
| 硬度計最好用於測試均勻的材料。表面顆粒、纖維或粗糙的材料結構會使硬度值變化,難以確定,因為硬度計的壓痕直徑較小。
要想得到精確的硬度值,被測材料的厚度至少1/32(0.79mm),樣品應足夠大,從壓痕點到樣品的邊緣的距離最(3.2mm)。測試區域應光滑且不應有機械損傷。 簡單的對儀器施壓驅動彈簧,使測試樣品與設備接觸。該測試點必須垂直於被測樣品表面。對於非常軟的材料,必須加壓到底,直到被測物的壓痕無法再下陷 (硬度值不會再往下)。 |
| 提示:量測非常軟的材料時,不同硬度測量系統是無法有統一的量測數值,為了避免這個情形,所以型號935與型號936不會相互轉換的硬度圖表。我們建議要正確的選擇硬度計,特定的硬度計都有一定的硬度檢測範圍、材質。 |
| GYZJ934-1近似轉換曲線圖 |
 |
| GYZJ-935 和 GYZJ-936近似轉換曲線圖 |
 |
| GYZJ934-1 近似轉換圖表 | |||||||
| GYZJ-934-1 | Brinell | Vickers | Webster | Rockwell | Rockwell | Rockwell | Rockwell |
| 10mm 500kg | 5kg | Model B | B | E | F | H | |
| 35 | 21 | 32 | |||||
| 36 | 22 | 35 | |||||
| 37 | 23 | 37 | |||||
| 38 | 24 | 40 | |||||
| 39 | 25 | 42 | |||||
| 40 | 25 | 26 | 45 | ||||
| 41 | 26 | 27 | 47 | ||||
| 42 | 26 | 28 | 49 | ||||
| 43 | 27 | 29 | 51 | ||||
| 44 | 27 | 30 | 54 | ||||
| 45 | 27 | 30 | 56 | ||||
| 46 | 28 | 31 | 58 | ||||
| 47 | 29 | 32 | 23 | 60 | |||
| 48 | 30 | 33 | 0.7 | 26 | 62 | ||
| 49 | 31 | 34 | 1.3 | 28 | 64 | ||
| 50 | 32 | 35 | 1.9 | 31 | 66 | ||
| 51 | 33 | 36 | 2.5 | 34 | 68 | ||
| 52 | 34 | 38 | 3.1 | 38 | 70 | ||
| 53 | 35 | 39 | 3.6 | 39 | 30 | 72 | |
| 54 | 37 | 40 | 4.2 | 41 | 34 | 73 | |
| 55 | 38 | 41 | 4.7 | 44 | 37 | 75 | |
| 56 | 39 | 43 | 5.3 | 46 | 40 | 77 | |
| 57 | 40 | 44 | 5.8 | 48 | 43 | 78 | |
| 58 | 42 | 45 | 6.3 | 50 | 46 | 80 | |
| 59 | 44 | 47 | 6.8 | 53 | 48 | 82 | |
| 60 | 45 | 49 | 7.3 | 55 | 51 | 83 | |
| 61 | 47 | 50 | 7.6 | 57 | 54 | 85 | |
| 62 | 48 | 52 | 8.3 | 59 | 56 | 86 | |
| 63 | 50 | 54 | 8.8 | 61 | 59 | 88 | |
| 64 | 52 | 56 | 9.2 | 63 | 61 | 89 | |
| 65 | 54 | 58 | 9.7 | 65 | 63 | 90 | |
| 66 | 55 | 60 | 10.1 | 67 | 66 | 92 | |
| 67 | 58 | 62 | 10.8 | 69 | 68 | 93 | |
| 68 | 60 | 65 | 11.0 | 71 | 70 | 94 | |
| 69 | 62 | 67 | 11.4 | 73 | 72 | 95 | |
| 70 | 64 | 70 | 11.8 | 17 | 75 | 74 | 97 |
| 71 | 67 | 72 | 12.2 | 23 | 76 | 75 | 98 |
| 72 | 69 | 75 | 12.6 | 28 | 78 | 77 | 99 |
| 73 | 71 | 78 | 12.9 | 33 | 80 | 79 | 100 |
| 74 | 73 | 81 | 13.3 | 38 | 81 | 80 | 101 |
| 75 | 76 | 85 | 13.7 | 42 | 83 | 82 | 102 |
| 76 | 80 | 88 | 14.0 | 47 | 84 | 83 | 103 |
| 77 | 84 | 92 | 14.3 | 51 | 86 | 85 | 104 |
| 78 | 87 | 95 | 14.7 | 55 | 87 | 86 | 105 |
| 79 | 90 | 99 | 15.0 | 59 | 88 | 88 | 106 |
| 80 | 94 | 103 | 15.3 | 63 | 90 | 89 | 106 |
| 81 | 97 | 108 | 15.6 | 66 | 91 | 90 | 107 |
| 82 | 100 | 112 | 15.9 | 70 | 92 | 91 | 108 |
| 83 | 105 | 117 | 16.2 | 73 | 94 | 92 | 109 |
| 84 | 109 | 121 | 16.4 | 76 | 95 | 93 | 109 |
| 85 | 113 | 126 | 16.7 | 79 | 96 | 94 | 110 |
| 86 | 117 | 131 | 16.9 | 81 | 97 | 95 | 111 |
| 87 | 122 | 137 | 17.2 | 84 | 98 | 96 | 111 |
| 88 | 126 | 142 | 17.4 | 86 | 99 | 97 | 112 |
| 89 | 131 | 17.6 | 88 | 100 | 98 | 112 | |
| 90 | 135 | 17.8 | 90 | 101 | 98 | 113 | |
| 91 | 139 | 18.0 | 102 | 99 | 114 | ||
| 92 | 145 | 18.2 | 103 | 100 | |||
| 93 | 18.4 | 103 | 101 | ||||
| 94 | 18.6 | 104 | 101 | ||||
| 95 | 18.7 | 105 | 102 | ||||
| 96 | 18.9 | 106 | 102 | ||||
| 97 | 19.0 | 106 | 103 | ||||
| 98 | 19.2 | 107 | |||||
| 99 | 19.3 | 107 | |||||
| 100 | 19.4 | 108 | |||||
| GYZJ-935 和 GYZJ-936 近似轉換圖表 | |||
| Type D Durometer | GYZJ-935 | GYZJ-936 | |
| 52 | 6 | ||
| 53 | 9 | ||
| 54 | 12 | ||
| 55 | 15 | ||
| 56 | 18 | ||
| 57 | 21 | ||
| 58 | 24 | ||
| 59 | 27 | ||
| 60 | 30 | ||
| 61 | 32 | ||
| 62 | 35 | ||
| 63 | 38 | ||
| 64 | 40 | ||
| 65 | 43 | ||
| 66 | 45 | ||
| 67 | 48 | ||
| 68 | 22 | 50 | |
| 69 | 28 | 52 | |
| 70 | 30 | 54 | |
| 71 | 34 | 57 | |
| 72 | 38 | 59 | |
| 73 | 41 | 61 | |
| 74 | 45 | 63 | |
| 75 | 48 | 65 | |
| 76 | 51 | 67 | |
| 77 | 54 | 69 | |
| 78 | 57 | 70 | |
| 79 | 60 | 72 | |
| 80 | 63 | 74 | |
| 81 | 68 | 76 | |
| 82 | 69 | 77 | |
| 83 | 71 | 79 | |
| 84 | 74 | 80 | |
| 85 | 78 | 82 | |
| 86 | 79 | 83 | |
| 87 | 81 | 85 | |
| 88 | 83 | 88 | |
| 89 | 85 | 87 | |
| 90 | 87 | 88 | |
 |
 |
 |
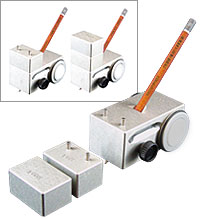
| 巴可硬度計校正示範 |
Barcol Hardness Tester
| Description | ||||
|---|---|---|---|---|
| Portable | The Impressor is a convenient tool for testing the hardness of aluminum, aluminum alloys, copper, brass and other materials including plastics and fiberglass. The instrument is designed for use on fabricated parts and assemblies as well as on raw stock. | |||
| Easy to Use | No experience required; can be used in any position and in any space that will allow for the operator's hand. The hardness reading is instantly indicated on the dial, which is divided into one hundred graduations. No waiting, pre-loading or separate measurements. | |||
| Lightweight | The Impressor weighs only 1 lb. 2 oz. The entire Impressor package comes complete with carrying case, adjusting wrench and two spare indenter points. The Impressor + case = 2 lb. 8oz. Shipping weights = 4 pounds, box = 12 x 11 x 6 inches, dimensional weight 5 pounds. (1.8 kilograms, box = 21 x 28 x 16 cm, dimension weight 2.5 Kilograms) | |||
| Applications | ||||
| Four Models Available |
GYZJ 934-1 for soft metals such as aluminum and its alloys, brass, copper, and some of the harder plastics and fiberglass. Approximate range 25 to 150 Brinell (10 mm ball 500 kg load). This unit meets American Society for Testing and Materials (ASTM) Standard D2583. GYZJ 934-1-0-1 a variation of the 934-1 that has a "flat bottom" shaped support leg. This is used to sit on top of the crest of the round rung of a ladder such as a fire department ladder. Approved by the NFPA, National Fire Protection Agency. GYZJ 935 for the softer plastics and very soft metals. GYZJ 936 for extremely soft materials such as lead, linoleum and leather. |
|||
| Information | ||||
| The Impressor is best suited for testing homogeneous materials. Materials of granular, fibrous or coarse structure will produce a wide variation in hardness readings because of the small diameter of the indenter point. For accurate readings, material should be at least 1 /32"thick and large enough for a minimum distance of 1/8" in any direction from the indenter point to the edge of the specimen. The testing area should be smooth and free from mechanical damage. Simply exert alight pressure against the instrument to drive the spring-loaded indenter point into the material. The indenter point must be perpendicular to the surface being tested. On very soft metals, the highest reading should be used since cold flow permits the spring loaded indenter point to continue penetration. Note: Physical characteristics of very soft materials are such that uniform correlation between different hardness measuring systems cannot be established. We recommend that Impressor hardness limits for each material be established by test. |


